I recently picked up a Monoprice Maker Select Plus 3D printer, which is a rebranded Wanhao Duplicator i3 Plus. The manual that came with the printer is utterly useless as far as explaining the setup process for this printer, though. After spending a week doing a lot of research and also a ton of trial and error, I've learned enough to be competent. I'm making this post to help me remember as well as to help others who might be trying to figure this printer out.
Thanks for your support! Links to third party websites in this article may contain affiliate IDs. If you purchase something from these links, the blog might get a small percentage as revenue. We use that money to offset the cost of creating and hosting our content. If you'd prefer not to participate in this program, don't click these links.
The Maker Select Plus is exactly the same as the Wanhao Duplicator i3 Plus. This printer also has a lot in common with the Monoprice Maker Select which makes sense, since the Maker Select is just a Wanhao Duplicator i3. The mechanism is basically identical between the "Maker Select" and the "Maker Select Plus," with the major difference being that the electronics are housed in the base of the Plus and in a separate box in the non-Plus. The Plus also has a touchscreen, which is both good and bad. The controls on the touchscreen are a bit more of a pain, in my opinion, since you can't just push and hold to repeatedly choose an option. Moving the axes manually is kind of tedious for this reason. I got a good deal on the Plus, though, so I don't regret the extra few bucks I paid.
Warning I'm an engineer with years of experience in motorized embedded systems. That said, I'm still a 3D printing newbie. Following my instructions, even 100% correctly, might still lead to you damaging your printer in some way. Any operations you carry out on your computer/printer are done at your risk. I make no guarantees and won't be liable if you do damage to yourself, your gear, etc as a result of the notes presented on this page.
Okay! The big fat warning is out of the way. Let's move on to the user manual, which is a total train wreck. Let's go through the steps and see what corrections or lessons I learned.
Assembly (Monoprice Maker Select Plus)
When it's time to assemble the printer (this was "step 6" in my manual) , there are two main pieces. One is the printer base, which contains the touchscreen and the Y axis setup. The other is the tower frame, which has the Z and X motors. In order to get my tower to fit over my printer base, I had to flex the tower a bit. Otherwise, there was interference between the legs of the tower that prevented it from moving smoothly over the base. The screws on each side can be started by hand to get the pieces somewhat together before you grab the allen wrench to tighten.
Pro Tip Allen wrenches are freaking annoying. If you've got a few bucks to spare, consider grabbing an allen wrench bit set. You can fit these in most cordless screwdrivers, or you can also pick up a compatible hand driver.
Soon after assembly, you need to level the X-axis rod. (This is step 9 in my manual). Unless your X-axis is really, really obviously off-level, I suggest waiting to do this until after you've hooked everything up, turned the printer on, and homed the X/Y/Z axes. If you don't home first, it's possible to move the right (or idler, the one without a motor) side of the X-axis down lower than the stops would normally allow you to, which causes all sorts of weird misbehavior.
Speaking of homing, let's skip to step 19 now. Here, you're asked to home the X/Y/Z axes and then shut the printer off. First, make sure the bed is as tight to the Y-axis carriage plate as it can be, by tightening the thumbscrews until the springs between the bed and the Y-axis plate are squished as far as they can be. Then, home the X/Y/Z axes.
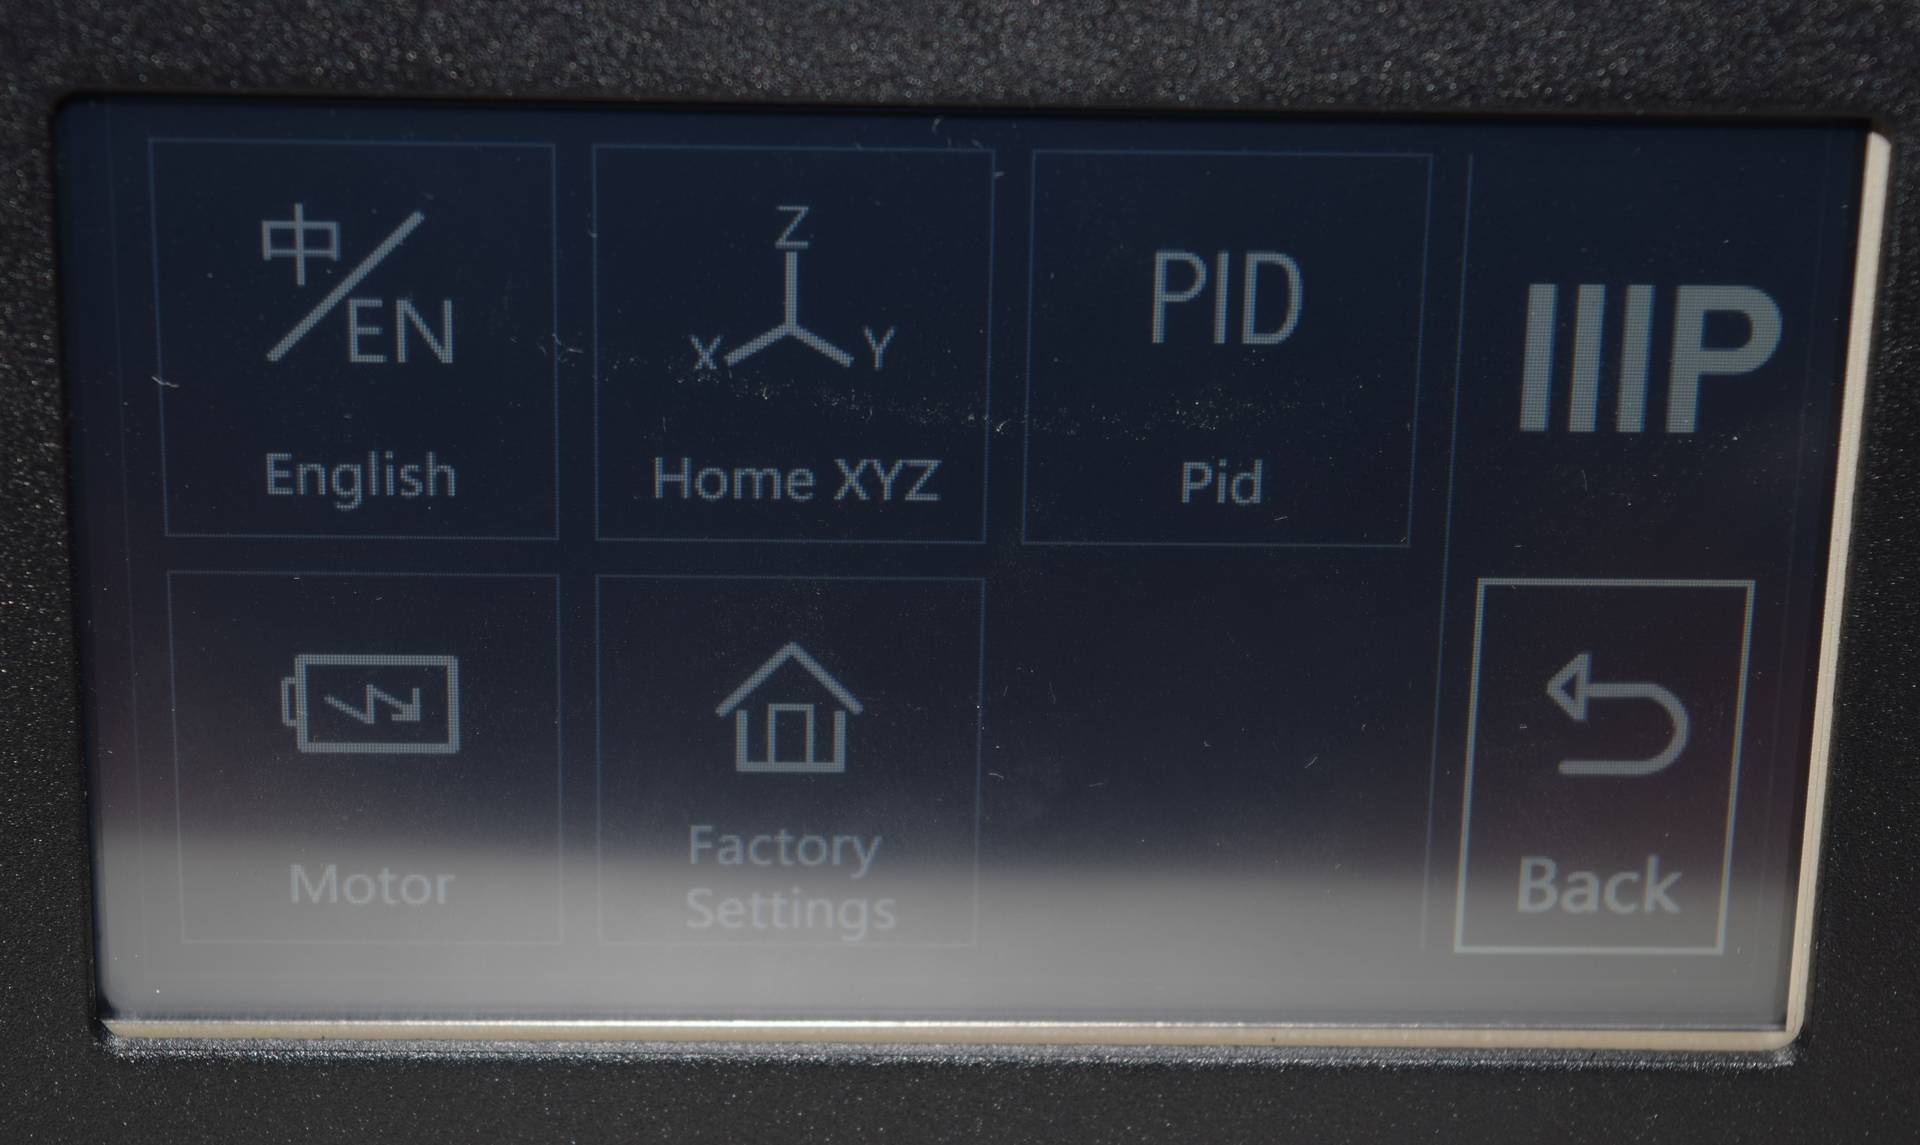
The "Tool" menu has separate buttons for homing the X, Y, and Z axes, but the "Home All" option is actually under the "System" menu. It doesn't really matter which option you use, but I thought I'd point this out because I found it confusing.
Once you've homed the X/Y/Z axes, now you can push the "disengage motors" button which will allow you to manually move any of the axes however you wish. If you don't push this button (or shut down the printer) before trying to move the axes, the servo motors will keep the printer locked into place.
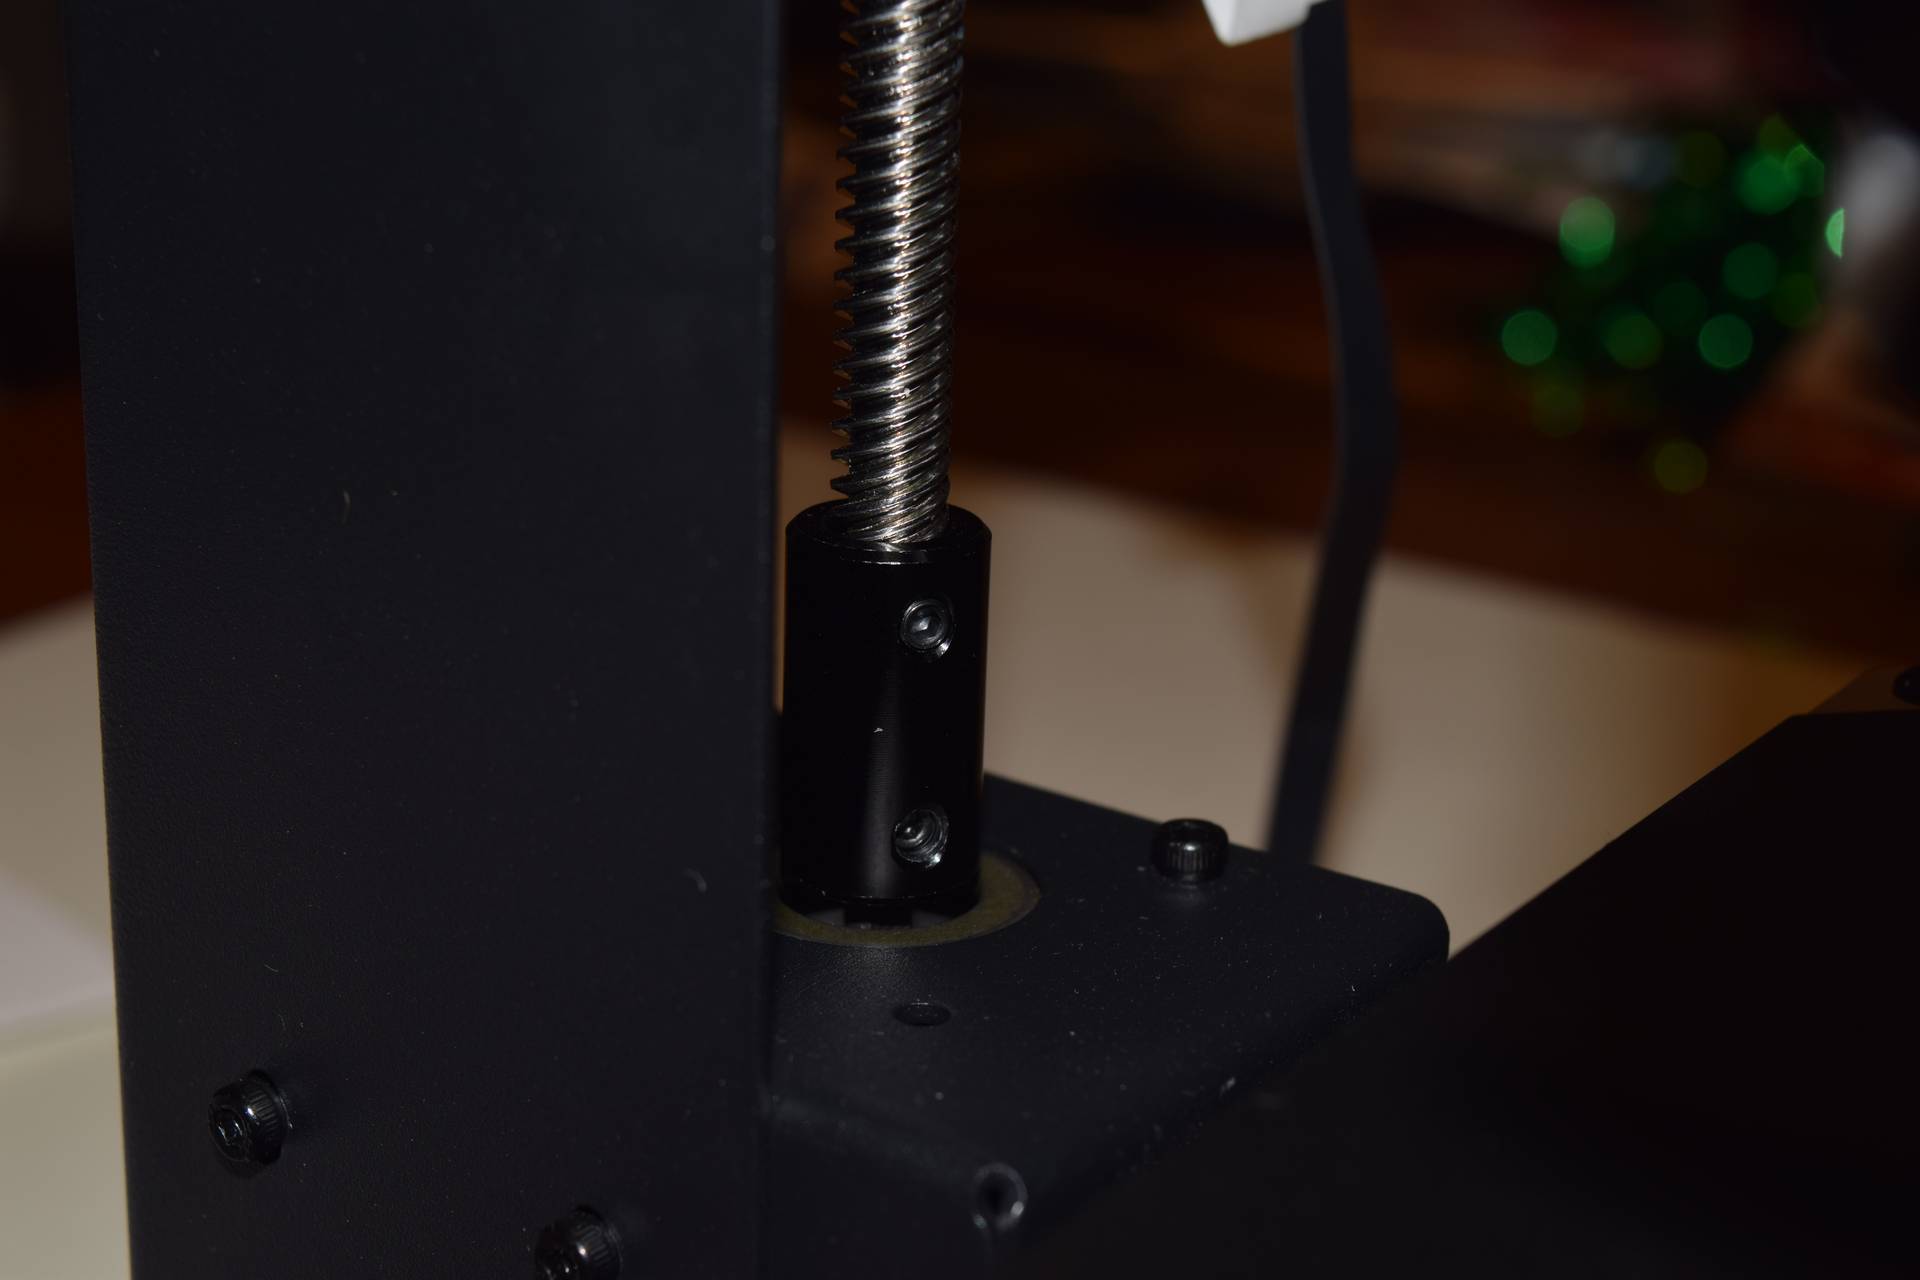
Now's a good time to make sure the right side of the X axis is level by putting a level on it, and then turning the black metal Z-axis coupler on either side until the X axis is completely level. You might need to hold one coupler steady while you turn the other, since they will tend to want to move in unison.
Pro Tip Note that the motor controls will let you force the Z-axis down below the point which it considers itself "homed," which can cause all sorts of awful grinding noises. The safest thing to do is home the Z-axis, and then make sure you never go lower than that position. If you do go below the home position on the Z-axis, re-level your X-axis rods before continuing.
Once you have the X-axis rod level, use the motor controls in the tools menu to check and see if the X-axis moves up and down the Z-rods smoothly. If it doesn't, you'll probably hear a clicking noise as the threaded rod slips or skips. If this happens, tighten the set screws on the offending black metal coupler a little bit to get a better grip.
Once you're happy with the Z-axis performance, home that axis and disengage the motors (or turn off the printer). Now is also a good time to make sure the hot end is cold, assuming you've ever warmed it up before. It's now time to level the bed. Leveling the bed is simple in theory but takes a bit of practice. Luckily, it seems to stay pretty level in my experience. I only have to futz with it every few days.
Pro Tip "Leveling" is a bit of a misnomer. You're not actually leveling the bed - 3D printers can print if the bed and the extruder are not level, they just need to be a consistent distance from one another. The technically correct term for this process is tramming.
What you want to do is grab something very thin. My printer came with a plastic card, but some people swear by receipt papers, or you could get all fancy and use a feeler gauge. The basic principle is twofold. One, the nozzle needs to be very close to the bed without touching it. Two, the nozzle needs to be a consistent distance from the bed at all points. I say "at all points" but honestly, the most important zone is towards the middle, since that's where most of the printing is done.
Pro Tip Before you level the bed, double check that the nozzle is cold (don't want to burn your card!) and also that the end of the nozzle is clear of any residual plastic. If there's some plastic hanging off the edge, that's going to get in the way and make it impossible to get the small distance you need between the nozzle and the bed.
To proceed with leveling, your Z-axis should be homed. (We did that a couple of paragraphs ago, remember?). The motors need to be disengaged so that you can move the X and Y axes freely. Turn the four thumbscrews at the corners of the bed until the nozzle isn't touching the bed. Then, pick a corner and move the nozzle about halfway between the corner of the bed and the center. Put your thin object between the nozzle and the bed. Now, adjust the knob in the corner while sliding your thin object back and forth under the nozzle. At some point, you'll start to feel friction between your object, the nozzle, and the bed. If your object is particularly thick (like a business card) then you want to feel a good amount of friction before you stop adjusting the thumbscrew. If your object is thinner, you might want to wait until you can feel the friction and then move the bed back down a touch. Repeat with the other three corners, and then do a double check on each corner before moving on.
FAQ What happens if I get the bed too high/too low? The most important thing to ensure is that the nozzle isn't dragging on the bed. This will cause the nozzle and the bed to take damage when you try to print. It's not the end of the world if it drags across the build mat for a few seconds, but it is something you should try to avoid. Having this distance otherwise incorrect will lead to bad/ugly prints. It will be obvious on the first layer that something is wrong. If it doesn't look like any plastic is coming out, the nozzle is too low. If the plastic isn't adhering to the bed, it's likely that the nozzle is too high. If the first layer looks uneven, chances are one of the corners is off. In any event, cancel the print, and re-check your level.
Loading Filament (Monoprice Maker Select/Select Plus)
After leveling the bed, it's time to load the filament. Filament is touchy stuff, and it doesn't like being left out for very long. If you're not printing, you need to unload the filament and store it in an airtight container - for my 1kg rolls, a gallon size ziplock bag works fine.
Pro Tip Desiccant is your friend. It will absorb moisture inside your airtight container, thus prolonging the life of your filament. They make desiccant that changes color to indicate saturation, which can also be dried out and reused. I suggest drying out in the oven at 245 degrees F rather than using the microwave. You can also use your printer to print desiccant boxes, or you can drill small holes in pill bottles if you have extras lying around.
When loading the filament, first go to the "Tools" menu, then touch "Filament" then "Load Filament". This will heat up the hot end and make the extruder motor turn continuously. If your printer doesn't have these options, preheat the extruder and once hot, you can use the "E-axis" + button (That's E for Extruder) to move the extruder gear manually. Don't try to load filament while the hot end is cold, it won't work!
While the hot end is heating up, trim, whittle, or otherwise sharpen the end of the filament. Bend it a bit to straighten it out. What we're going to try to do is snake the filament through a small hole that you can't see inside the cold side of the extruder, and both of these steps will make it easier to hit. You'll also want to make sure the Z-axis is up a bit, so that you give the extruded plastic somewhere to go.
Once the extruder is hot, press down on the black lever and insert the end of the filament through the small hole at the top. Do your best to get it to go straight down. You don't need to push very far, maybe an inch or so. Then release the black lever. This lever actually moves a ball bearing that normally pushes the filament right up against the extruder gear. If you have a flashlight, you can shine it through the small gap on the right side of the black lever to see the gear.
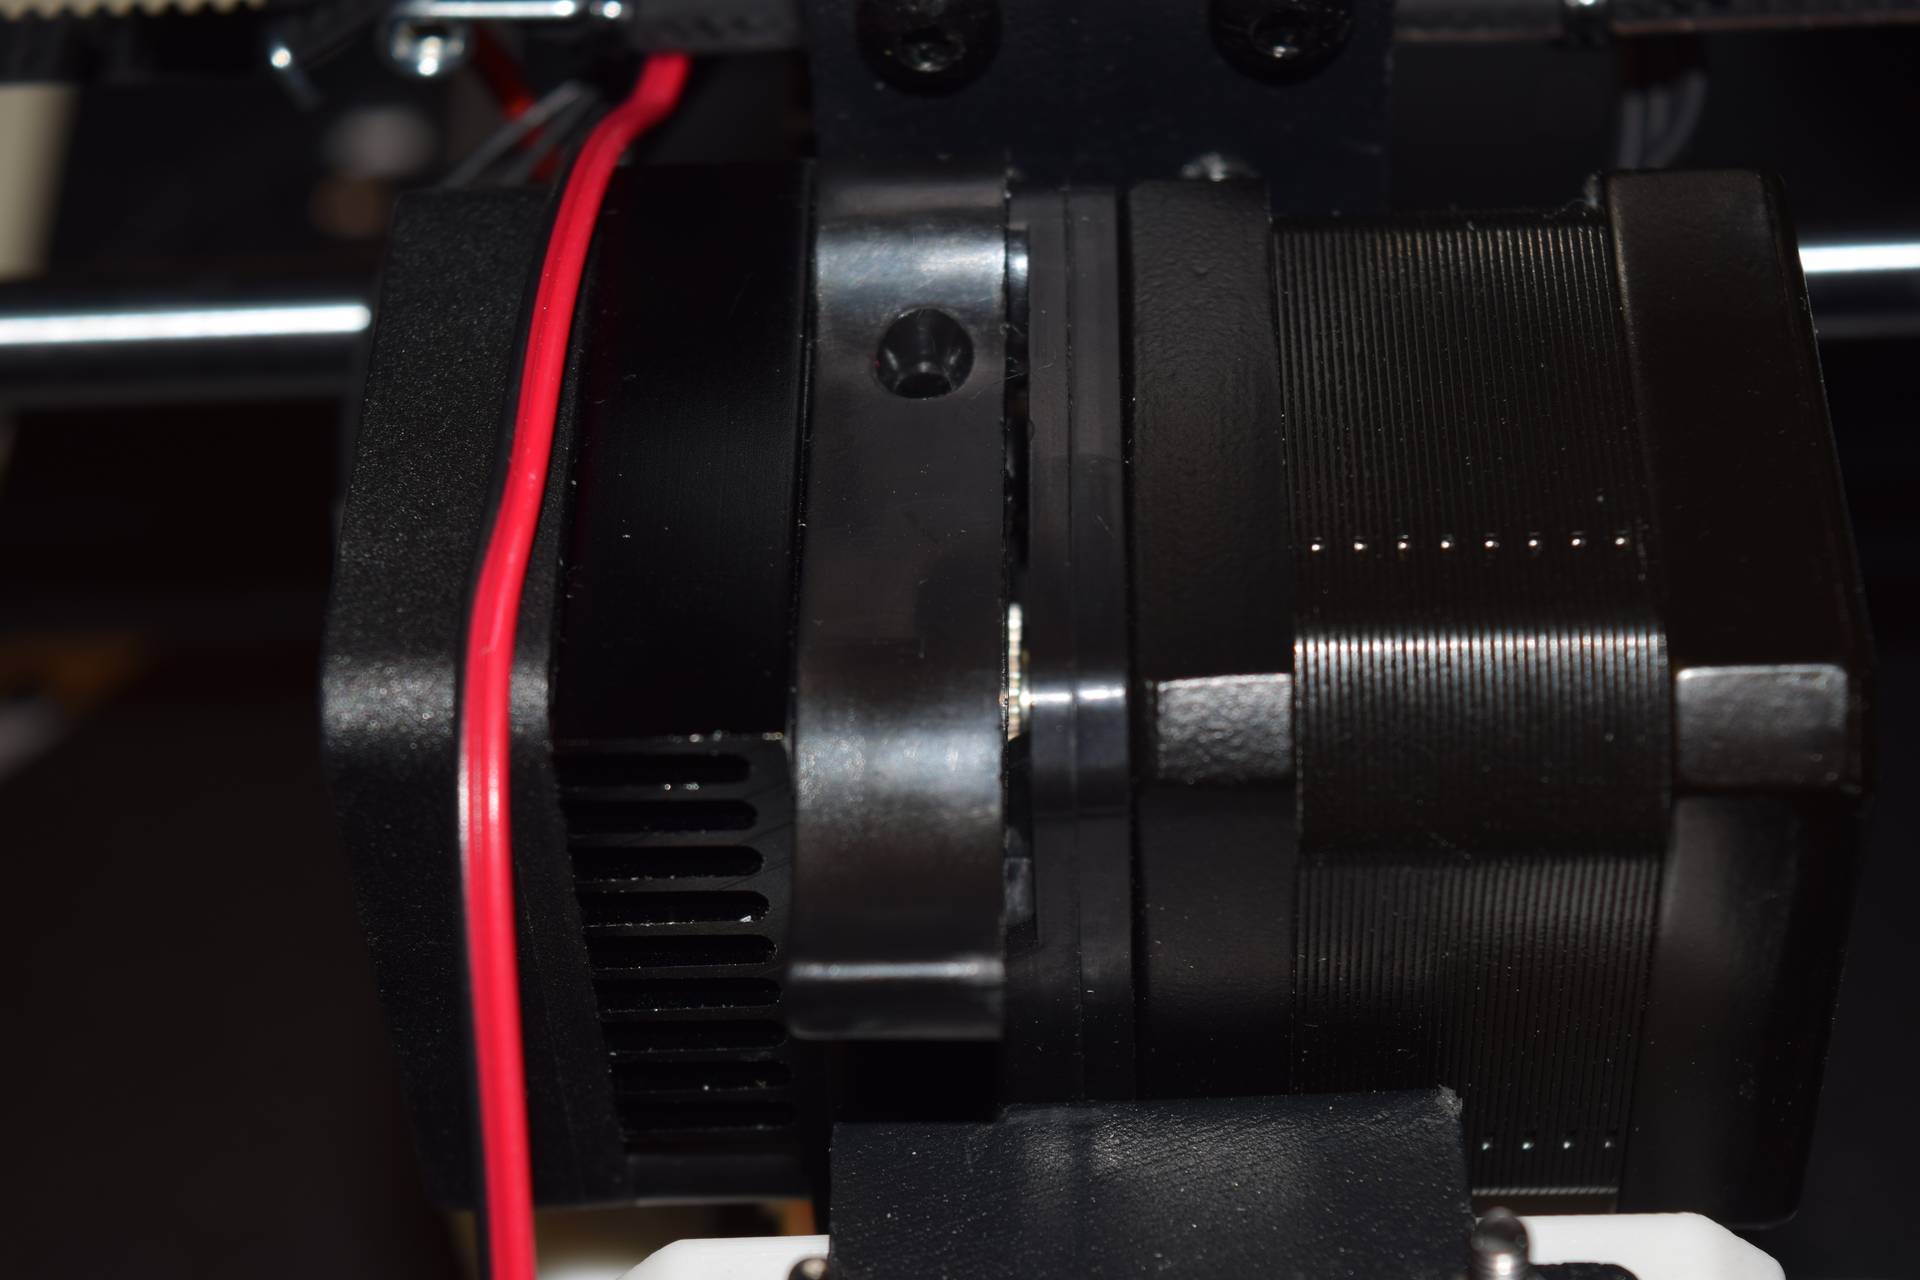
Pro Tip If you're having trouble getting the filament to load properly, you might need to take the cold end of the extruder apart and check for something jammed in there. To do this, you can remove the two screws that hold the fan/heatsink to the extruder motor. Careful, though, since removing these two screws releases the extruder motor and it can fall. I put something soft under the motor to catch it just in case it comes off. Once the fan and heatsink are out of the way, you can see down into the aluminum block where the filament is trying to go. There's a PFTE (Teflon, although it looks like white plastic) tube around the outside, but is there anything caught in the middle? If so, use some tweezers to pull it out.
On my printer, the gear won't turn if the X/Y/Z axis is moving manually, and if the gear is turning manually, the printer will "queue up" X/Y/Z moves. This can be very confusing if you're using the manual motor controls. Plus, since there's no UI feedback about the extruder gear's status, it's also hard to know when the extruder gear has stopped without listening very carefully or keeping your eye on the gear. All the more reason to use the "Load Filament" option if you have it!
Once you're done inserting the filament, watch two places. One, check to see that the filament is moving towards the extruder. It's going to move very slowly, but you should notice a slight movement in your reel. Once you've confirmed that it is moving, take a look at the nozzle. After a few seconds, plastic should start to shoot out. Give it a bit of time so that everything is properly primed, then stop the E-axis (or back out of the "Load Filament" screen).
Pro Tip When you extrude plastic into empty space, it's going to get all stringy and cling to the nozzle. That means you're going to be doing a lot of cleaning plastic off the hot end, and it is (duh) hot. I suggest grabbing some long metal tweezers to help with this.
Unloading Filament (Monoprice Maker Select/Select Plus)
While we're on the subject of filament, and since I've covered how important it is to properly store it, let's talk about unloading filament. This direction is substantially easier, although gotchas still arise. If you've got the "Unload Filament" option, it's basically trivial. Use this option, wait for the hot end to heat up, then depress the lever and pull the filament out. Trim any strings, and then carefully secure the end of the filament. If you let the end of the filament go, it will wrap itself up with the spool, potentially causing knots and tangles, which ruin prints.
Pro Tip In fact, the safest thing to do is to use a clip to attach the filament to the reel before you unload it. Thingaverse has a bunch depending on the type of spool your filament provider uses. When you're done printing, before you start the unload process, clip the filament to the reel. Then just make sure that the end of the filament isn't tangled after you load the filament again later.
Conclusion
At this point, you should be knowledgeable enough to get your first print going! Try one of the gcode files that is included on the SD card, assuming you haven't lost it by now. In the next article, we'll cover designing and printing something new.