The most popular format on the internet for 3d printed objects is the humble STL file. These files are great for slicing, but they're not so great for editing. STL is basically the PDF of the 3d printer world. Nothing hurts more than getting a STL file that is pretty darn good, but just needs a few tweaks. And we've all been in a situation where a STL is just too big for the printer, or is difficult to print in just one piece. The workflow for editing STL files can be somewhat painful, but with the tips and tricks in this article, you'll be well on your way to becoming an STL editing pro!
As an example in this article, I'm going to use DM Workshop's Chief Guh which you can download free from Shapeways. DM Workshop's models are very, very good, but I find that a lot of them could use some additional optimization for 3d printing. As a side note, if you're a Blender whiz and subscribe to his Patreon, you can get the .blend files he uses to generate the STLs - modifying these instead will save you a lot of time! But just for the sake of this guide, let's consider that not to be an option. There are plenty of STL-only 3d designs out there, after all.
Splitting an STL with Multiple Models
Sometimes the issue with your STL file is that it contains more than one model. You might not want to print everything a person has put in their STL - maybe you just need one part, or you want to print the pieces one at a time.
The best (free!) tool for splitting a STL model into separate items is Meshmixer. However, I'm going to be honest - Meshmixer is kind of a hot mess. I've had it crash on me pretty frequently, and I don't like using it for many operations. That said, it isn't too tricky to learn how to use it to split an STL.
- Open Meshmixer
- Click the "Import" button
- Click the "Edit" button
- Click "Separate Shells"
You should see something like this:
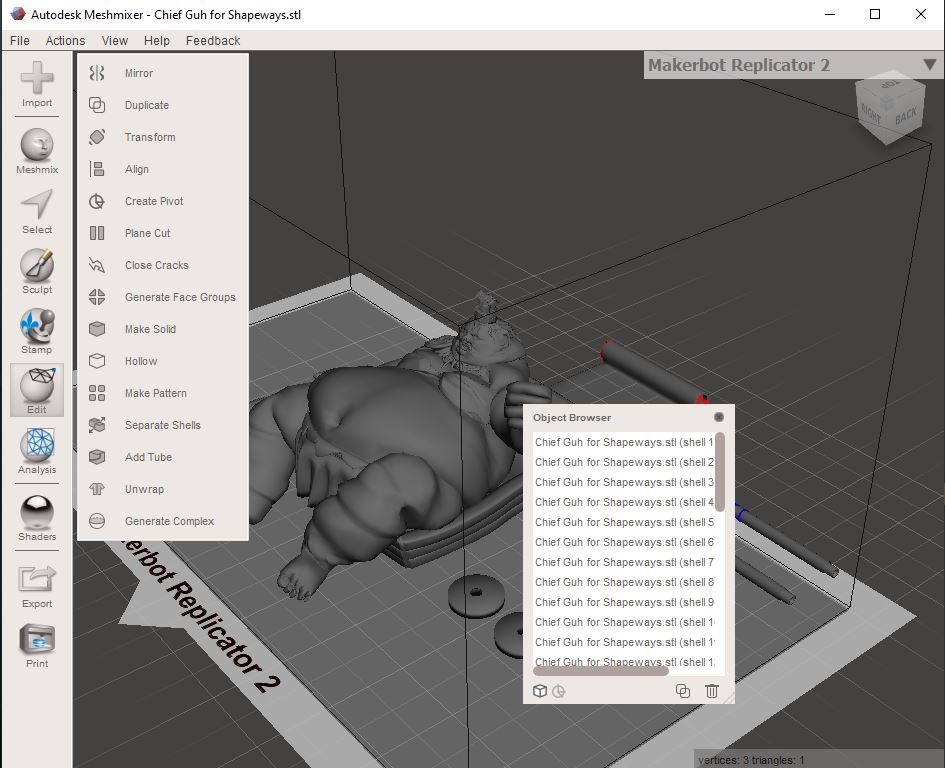
The Object Browser window will contain a list of all the separate 'items' in the STL file at this point. You might notice that there are more of these than you expect - sometimes a model isn't 100% "solid" and so when we split all the objects in the STL, it becomes more than one item in this list. If you click the "eye" icon to the right of the object name, you can toggle whether it is visible or not. You can also double click the name to change it. I'll use a combination of these tools to label the individual parts of the STL. Some of them might be totally worthless, in which case you can use the "trash can" icon in the lower right to remove them from the scene.
Pro Tip If you're planning on printing one piece now and the rest later, it might make sense to save your work as a .mix file, so that you can come back to the edited, split STL later on.
Once you've identified the part you want to extract, select it in the Object Browser, then pick "Export" from the File menu. If you want to extract multiple parts in the same file, I suggest selecting them all (hold shift to select multiple entries) and then click the Combine button in the menu that pops up when you have multiple things selected. You can then select another part and repeat the Export process for as many STL files as you wish to create.
Okay! Now we have separated an STL containing multiple objects, and exported those items into multiple STL files. But what if we need to make changes?
Modifying STL Files
There are many tools that purport to modify STL files. Some can be quite difficult to work with, and many are expensive. For this guide, I've chosen to highlight TinkerCad. TinkerCad isn't the best tool out there, but it's easy to use and it's also free. Blender can also do this, but learning Blender takes considerably more effort.
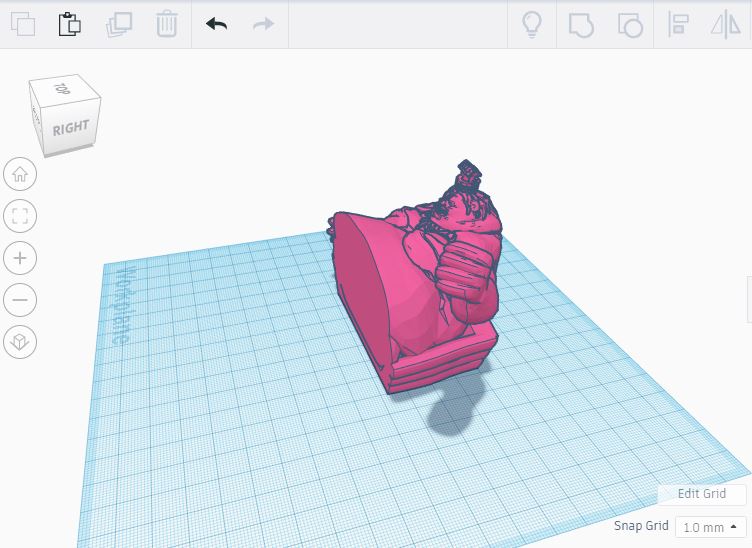
Log in (or create an account) and start a new Design. Then click the "Import" button, and then you can drag & drop your STL file into the Import window. (This might take a while for a large STL file) Once the import is finished, you should see something like:

The trick to splitting a large STL file in half is to create two copies of the model - one for each half. To accomplish that, we do the following:
- Select the model and choose "Duplicate" (the button between "Paste" and "Delete" on the left side of the toolbar, or press Ctrl-D) - you might not notice anything different, which is because the two identical objects are on top of each other.
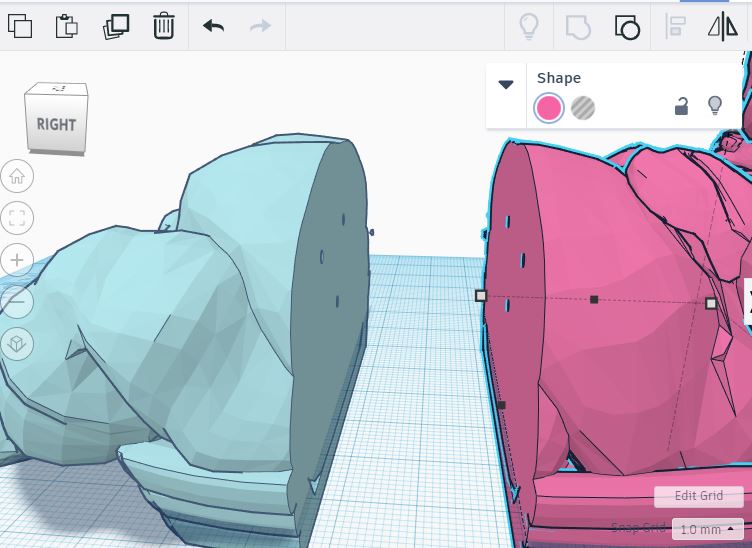
- Now the selection will be set to the duplicate object. In the "Shape" pane in the upper right, pick a new color (so we can tell them apart) and then click the gray "Light Bulb" icon to hide the duplicate. Now we have one copy visible and one copy hidden.
- Drag the striped box ("hole") from the "Shapes" toolbox onto the scene. It will stick to the Workplane, which is the "floor" the model is sitting on.
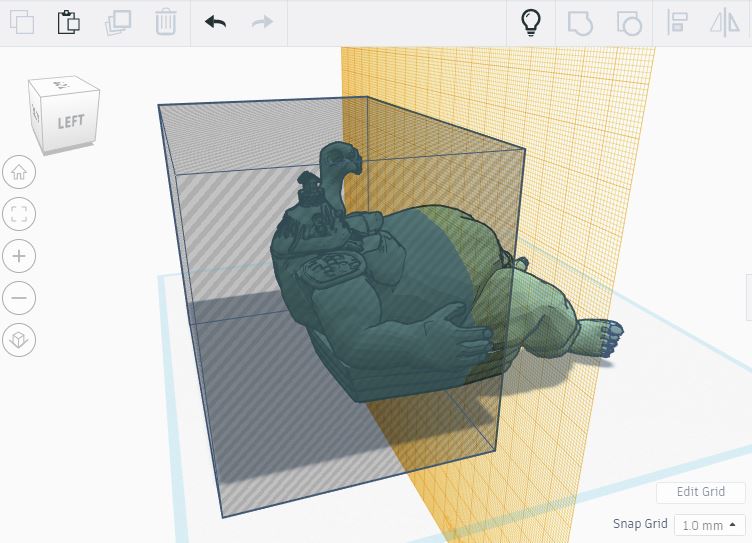
- Adjust the size of the new "box hole" until it covers one of the halves of the model. The box can be as big as you want, but make sure you don't hit things you don't want to split!
- Select both the "box hole" and the visible copy of the model, and then click the "Group" button on the toolbar (or press Ctrl-G). Wait for the red lines to go away - while they're visible, TinkerCad is working.
At this point, you should have half of the object visible:
If you just wanted to print half, you could stop here. Just click the half that is showing, click the Export button, and then save the STL file to your computer.
However, if you want to print the other half as well, it's pretty straightforward.
- Drag the "Workplane" from the shapes drawer on the right so that it sits on the 'cut half' of the visible model.
- Click the white "Light Bulb" icon in the toolbar to show the copy of the model - the one we hid earlier.
- Select the "cut half" of the model and then click the "gray lightbulb" icon in the Shape popup to hide it.
- Now, when you drag a new "box hole" onto the workplane, it will be locked to the plane we want to cut on. By default, it will want to sit on the wrong side of the workplane, so drag it so that it is sitting on the other face of the workplane.
- Like above, size the "box hole" so that it covers the entire other half of the model. Now it should look like:
- Again like before, select the "box hole" and the visible model, then click "Group."
At this point, you can click the white "Light Bulb" icon in the toolbar and you should see both halves of the model.
You can select one and export, and repeat for the other half.
There's no reason why you can't repeat this process to divide up a model into as many chunks as you want. For instance, you might want to remove the arm held above this giant's head so you can print it separately and attach it afterwards.
Aiding post-print reconstruction
So now that you can break a model into parts, you might be thinking "how do I put it together after I print it?" Thankfully, that's another easy problem to solve with TinkerCad. The trick here is to use the same tools we learned about in the previous section to create matching holes in both pieces of the print.
- Hide one half of the divided model
- Drag the Workplane so that it sits on the 'cut' edge of the model, if it isn't already
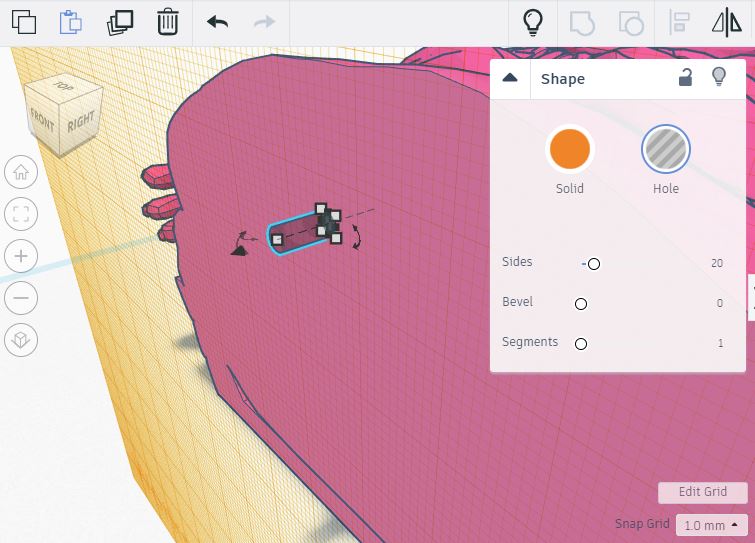
- Drag the gray striped cylinder from the "Shapes" toolbox onto the workplane
- Drag the cylinder to the correct size and location. You can make it whatever size and shape you want, but I like to make holes that are slightly larger than my filament diameter - that way, I can use small pieces of filament as "pins" to connect the two pieces.
- Make sure the cylinder sticks both into and out of the part of the model you can see right now. I usually make mine about 10mm long, with 5mm sticking out of the workplane.
- Duplicate this cylinder as many times as you need to in order to create enough pins to get good alignment
- Once you are happy with the number and location of the pins, select them all - then click "Duplicate" and on the Shape panel, click "Hide." This creates a hidden set of pins that we'll use to cut the other side of the model in a minute.
- Select all the pins and the visible half of the model again, then click Group. This will cut the holes in one side of the model.
- Click the white "Light Bulb" icon in the toolbar, which shows all objects - now you'll see both sides of the model and the hidden duplicated pins
- Hide the side of the model that already contains the pin holes
- Select the other side of the model and the duplicated pins, and Group them
At this point, you should have two pieces of the model that contain perfectly aligned pin holes that can be used to reassemble post-print!
Pro Tip If you're building a large object, you might want to create custom pins instead of using filament. I've created triangular holes before and then modeled triangular pins that are slightly smaller to fit inside them. This has the advantage of more structural strength at the cost of an additional design and object to print.
Making other changes
Once you get the hang of using the "hole" shapes that TinkerCad has, you can use them to make many small modifications to STL files. TinkerCad isn't perfect for this kind of work - ideally, you'd want to use something other than STL altogether. However, I've yet to find a better, simpler to use tool for this job.
Conclusion
Now you know how to:
- Break an STL file into a set of models
- Break up a model into a set of sub-STL objects to print
- Add guide pin holes to your STL objects so they can be reassembled
- Make other small modifications to STL files
With all this, you should be much better prepared to print cool stuff you find on the internet!