Bloons Monkey City towers are a diverse bunch, and it can be difficult to pick the right towers for any given level. If you've found yourself perplexed by the question "What's the best tower in Bloons Monkey City?" - don't fret! Each tower has its own strengths and weaknesses. There are some real clear winners, however. In this article, I'll lay out my argument for the best towers in Bloons Monkey City, and tell you when they work and when they don't.
# 10. Super Monkey
The Super Monkey is easily the most powerful monkey in the entire game. There's just no question that when a Temple of the Monkey God is built that it's going to wreck bloons across the entire map. It can absorb the abilities of nearby towers when it is built, which makes it the most powerful and versatile tower in the entire game!
Even the pre-Sun God version of the Super Monkey is still a force to be reckoned with. There are very few situations where a Super Monkey isn't the right answer to your bloon-related problems. Lead? Camo? Ceramic? MOAB? Psh. No problem.
The downside, though, is the cost. The Super Monkey costs thousands more than most other towers, and thus it is only really viable at high levels.
# 9. Banana Farm

The Banana Farm is unique among Monkey City towers in that it doesn't actually do any damage or help any nearby towers do damage. Instead, a Banana Farm is an investment in the future. As the bananas drop and are tapped, you generate small amounts of money. This money adds up over time. If you can get enough ahead of the game that you can afford one of these, it will eventually pay off. The earlier you can build it, the more it is worth!
The Banana Republic track grants more cash at the cost of convenience, as you'll be tapping bananas like mad. The Monkey Bank is easier to work with, and even pays interest, but isn't as profitable.
As the rounds drag on, you'll start earning less and less cash from popping bloons as the bloons get tougher and tougher. The only way to survive is Banana Farms!
Pro Tip Consider building the Banana Farm in range of a Monkey Village to save some of the costs associated with its upgrades.
# 8. Monkey Village
Speaking of the Monkey Village... let's talk about the Monkey Village next. This is another unique tower that does no damage by itself, but it does give all sorts of bonuses to nearby towers. Although it's rather expensive, it can save you money - towers are cheaper to build and upgrade in its radius, and you can bypass certain upgrades (like camo and lead popping) on individual towers by buying those upgrades at the Monkey Village instead. It can also make a strong set of monkeys even stronger with its various abilities, like upgraded radius and attack speed.
Pro Tip Monkeys built in the radius of the Monkey Village are indeed cheaper to construct. You still need the amount of cash needed to build the monkey normally, but less will be deducted from your available cash when you do build it.
# 7. Bomb Shooter
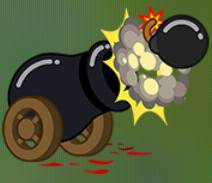
The Bomb Shooter's two upgrade paths make it a very versatile tower. If you take the Cluster Bomb path, it becomes a wide-area bloon demolishing machine. At the max upgrade for this path, it even stuns bloons! That can make a big difference when swarms of bloons are assaulting your defenses.
On the other hand, if you take the MOAB Mauler upgrade, it becomes a strong late-round anti-MOAB defense. The 10x MOAB damage boost is a major boon! At the highest level on this track, the Bomb Shooter gains an activated ability that does huge damage to the nearest MOAB, which is super useful when they start to swarm around round 20 or so.
The downside is that the Bomb Shooter is a relatively slow firing tower, even with the Missile Launcher upgrade. It tends to be overwhelmed by large clusters of bloons, and the MOAB upgrades aren't so strong that they can take a strong MOAB solo.
Pro Tip Before you get the Missile Launcher upgrade, Bomb Shooter projectiles travel slowly. You'll hit more often if you're shooting at slow bloons, shooting along a track, or using the "Close" targeting option.
# 6. Sniper Monkey
The Sniper Monkey is one of the best monkeys to have around against really strong bloons like ceramics and MOABs. Its strong shots pierce right through difficult bloon types like a hot knife through butter. It's also got infinite range, so it doesn't matter where the Sniper Monkey is, they'll hit their target with unerring accuracy.
Pro Tip If you can't make cash off of Banana Farms, the Sniper Monkey can take the Supply Drop upgrade to compensate. If you can delay bloons and stretch rounds out longer, you can maximize your supply drops per round.
Unfortunately, the Sniper Monkey is relatively slow to fire, so it is easily overwhelmed by large quantities of bloons. It's also super expensive to upgrade past the first couple of ranks, so it's not easy to deploy for early MOAB rushes.
# 5. Monkey Buccaneer
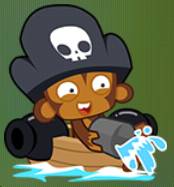
The Monkey Buccaneer combines a fast-firing dart cannon with extremely long range, all in a pretty affordable package. It can pop camo with a pretty cheap upgrade, although it can't handle lead at all.
On the Cruiser upgrade path, it gains a super-fast firing dart machine gun that can deal with even the largest bloon swarms. If you take the Cannon Ship track, it becomes more of a single-target high damage monkey that eventually gains anti-MOAB attacks.
The obvious downside - the Monkey Buccaneer is only useful on water. It's a ship, duh!
Pro Tip Many courses have lakes, and the Monkey Buccaneer can be placed on these just like in rivers or ocean. I know I often miss this fact when I'm planning my towers for a given level.
# 4. Spike Factory
Spike Factories are interesting, as they "store up" the ability to pop bloons, rather than dishing it out at a constant rate whenever bloons are in range. Thus, they make good additions to your defenses later in the course rather than earlier. They can catch stragglers, and pop camo bloons with no trouble at all. Their two upgrade paths can make Spike Factories effective against either swarms of ceramics or MOABs, depending on what makes the most sense for you.
The downside to the Spike Factory is that it's relatively expensive, and there's a maximum amount of bloons that it can really handle before it's just overwhelmed. If you end up building one near the end of the track to catch stragglers, chances are it will eventually outlive its usefulness there.
Pro Tip Placement on Spike Factories is critical. They will shoot spikes out onto the track anywhere in their attack radius. Try placing them in a spot where they can only see a single area of the track near the end for the most benefit.
# 3. Ice Monkey

The Ice Monkey is one of my favorite support monkeys in Bloons Monkey City and I'll tell you why. It can very easily manage big swarms of bloons, freezing, popping, and slowing them for a time. This means it's not as easily overwhelmed as the Glue Monkey - although I still do like a good Glue Monkey from time to time.
It can be tough to choose an upgrade path for the Ice Monkey. The Ice Shards upgrade is relatively inexpensive and can cause chain reactions within groups of bloons, but the Arctic Wind and Viral Frost are absolutely devastating against crowds of bloons.
Pro Tip Ice Monkeys can't see camo, and can't pop white bloons. Keep that in mind if you're planning on deploying them early in a track!
# 2. Mortar Monkey
The Mortar Monkey is darn useful. It can hit anywhere on the track with its mortars, pop lead easily, and is one of few towers that can be targeted and retargeted at will. With the Signal Flare upgrade, It's a good tower to pair with other towers that might have difficulty with, say, camo or lead. With this upgrade, the Mortar Monkey can hit camo bloons, and any hit by the tower will lose their camo.
Just keep in mind that the mortar fire won't hit every bloon. However, if you have Faster Reload, it can pop even the biggest swarms of lead bloons with no issues.
As you move from the lower rounds to later rounds, it may make sense to move where the Mortar Monkey is firing, since it's best against swarms of bloons rather than MOABs. Also, against regen bloons, make sure you set the target to be closer to your other monkeys.
# 1. Ninja Monkey

Oooh, the Ninja Monkey. Definitely my favorite tower, and I'll tell you why. Right out of the box, it can pop camo. It really doesn't start to shine until you start upgrading to Double Shot and Bloonjitsu. When you get a fully Bloonjitsu'd monkey, it is quite a sight to behold.
Don't neglect the other upgrade track, though! Seeking Shuriken is very useful, as it allows Ninja Monkey shots to curve and hit bloons they wouldn't otherwise. Also, Distraction is extremely powerful against strong bloons like ceramics.
The downside to the Ninja Monkey with Bloonjitsu is lead bloons. Thus, it's a good idea to pair this monkey with, say, a Mortar Monkey who can strip the lead for you.